Harvest Yeast Bread
This harvest yeast bread is simple to make, but the taste is way beyond simple. And you are about to fall deeply in love.
When your teeth sink into thick slices of this fluffy tender bread, your taste buds will start humming with pleasure.
Notes of zesty sweet marmalade, tart zing of cranberries, and mellow buttery taste of nuts make for pockets of amazing flavor.
Ready to make Harvest Yeast Bread? Let’s do it..
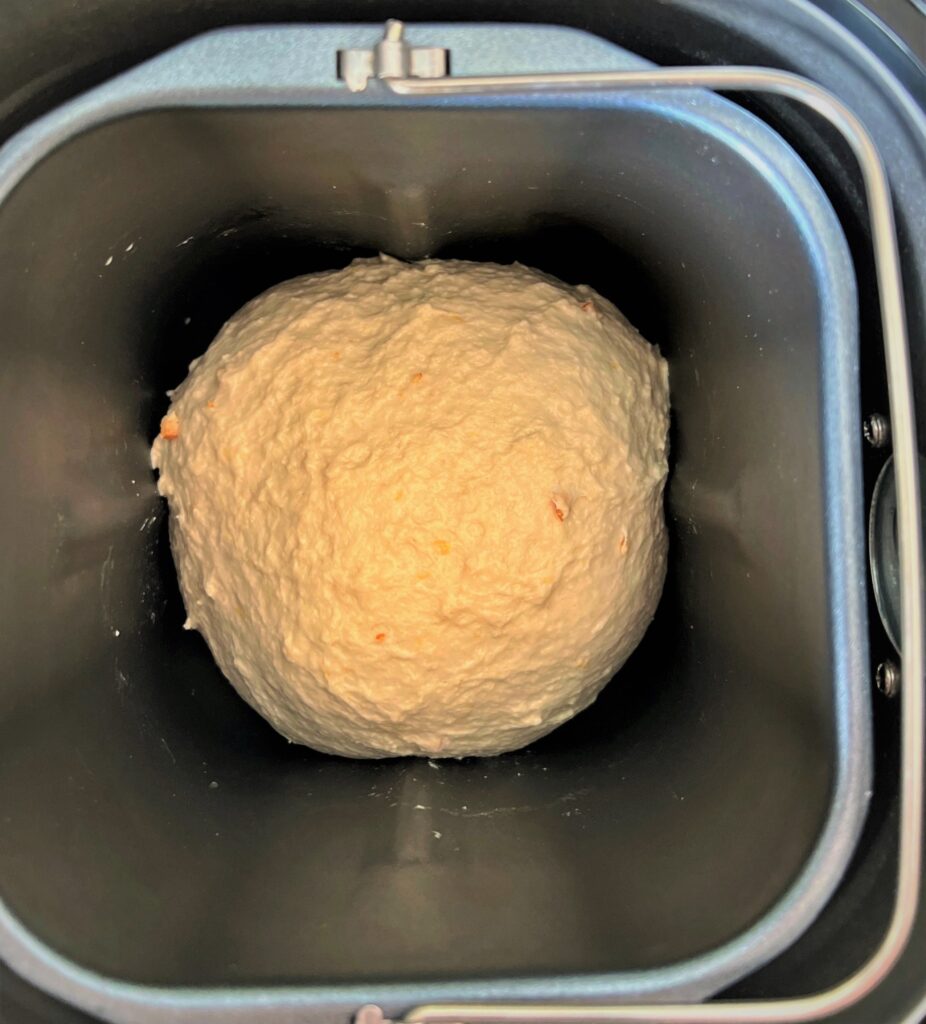
The photo above is right after the first knead, but before the add-ins.
Your harvest bread dough is a little shaggy looking, not the typical smooth ball of dough- that’s because of the marmalade.
Don’t worry about trying to knead the dough until it is satiny smooth, otherwise you will end up with a tough crumb.
How Your Dough Should Look:
What’s important is that the dough forms a ball. It will kind of spring back when you touch it, and also feel a bit sticky.
You don’t want it feeling dry, no stickiness at all, or too wet to form a ball.
Once it forms into a ball, the top should feel sticky to the touch while it is kneading.
Doesn’t look/feel right, do these steps until it does.
When you tap the top, it feels like batter, your finger sinks, or dough clumps to it: add more flour or potato flakes- 1 tablespoon at a time.
The dough feels dry, not sticky at all: add more warm water- 1 teaspoon at a time.
Proofing the Dough
After the dough cycle (if using bread machine) is done, roll the dough out and do the last rise in the pan.
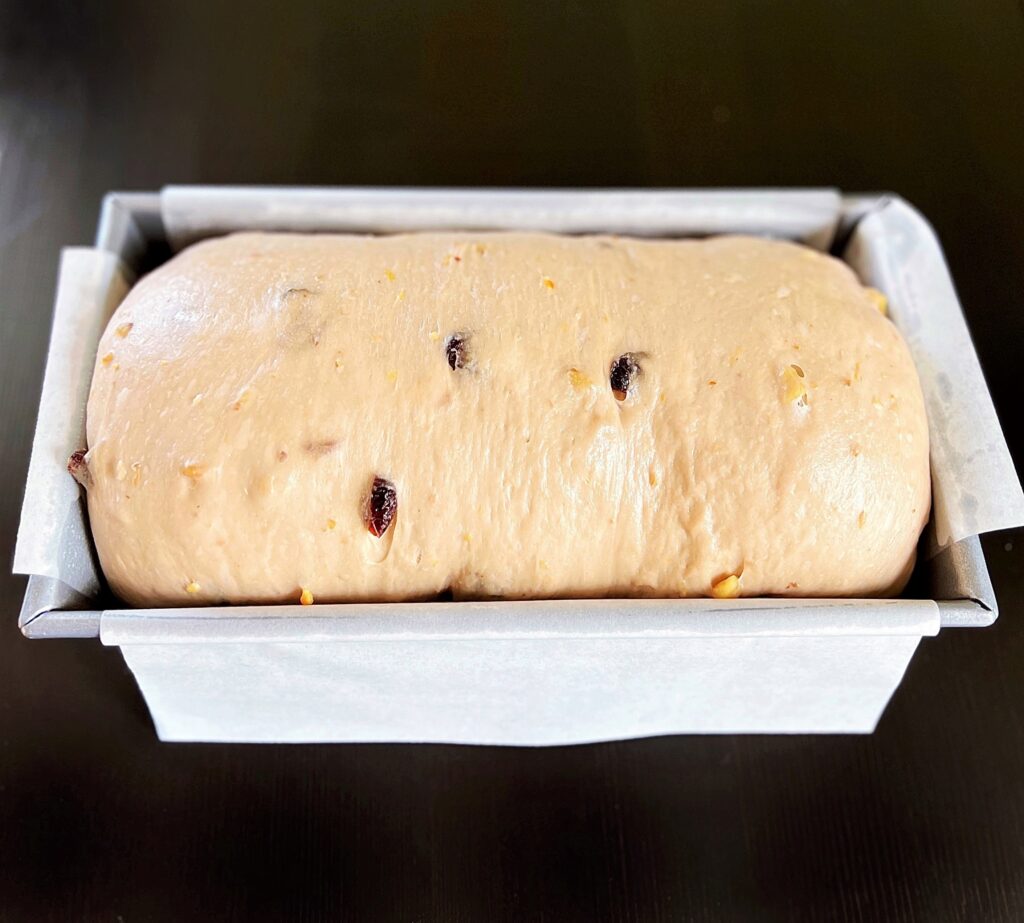
The photo above is the harvest yeast bread before baking. It’s 2 inches above the edge of the loaf pan.
When dough is 1 inch to 1 1/2 inches above the rim, depending how fast/slow it’s been rising, preheat oven for 20 minutes.
Dough rising time is going to depend on how warm or cool your kitchen is. It can take anywhere from 40 minutes to 2 hours.
I have helpful Tips and Links in my pumpkin yeast bread post that cover this- also more information on kneading.
Harvest Yeast Bread
I was on the phone practically non-stop, as I was making bread. Just had my air pods in. It’s that easy.
Well, taking photos is another thing. haha I thought I had taken pictures of the loaf out of the oven, but oops I didn’t.
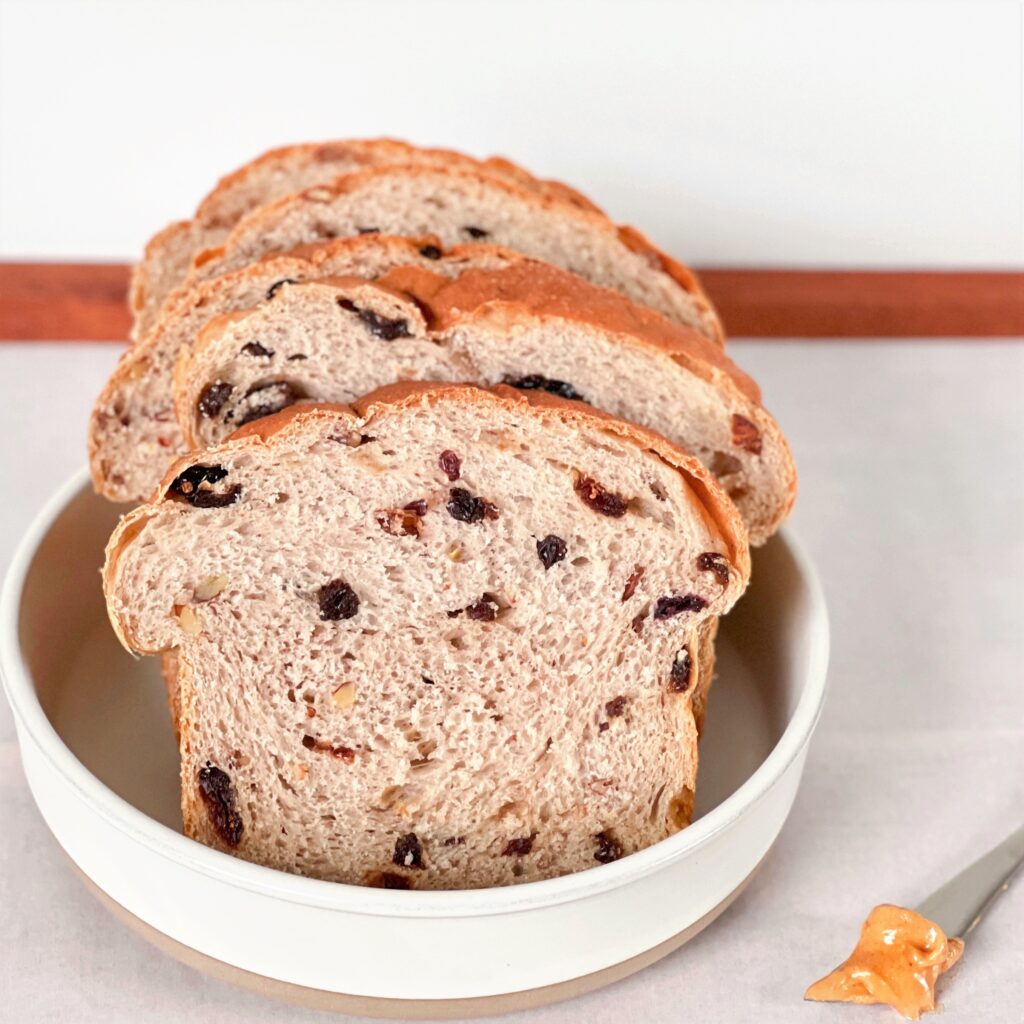
Maybe I’ll post a picture when I make it again. We LOVE this bread, and I make it often.
Sometimes I turn it into sourdough harvest yeast bread. Both are delicious!
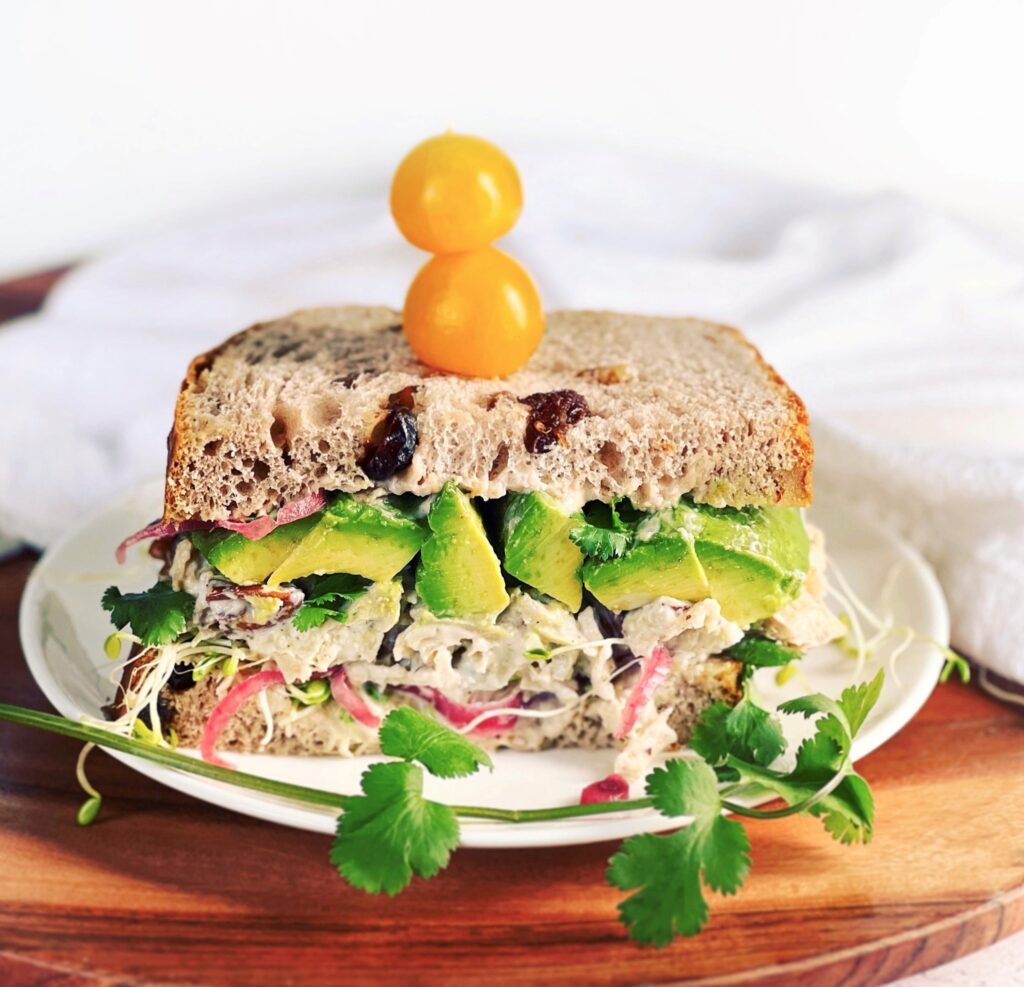
Taste how amazing it is stuffed with vegan chicken salad, sprouts, avocado, pickled onions, or cucumbers and tomato.
Ohhh, and for an over-the-top spicy and very tasty bite, my daughter adds kimchi too.
You may think that using a bread stuffed with sweet and zingy fruits are strange for a savory sandwich, but trust me- it’s magical!
(Note –> Use any marmalade or apricot jam, but I really love THIS ONE. They sell it in some stores and online.)
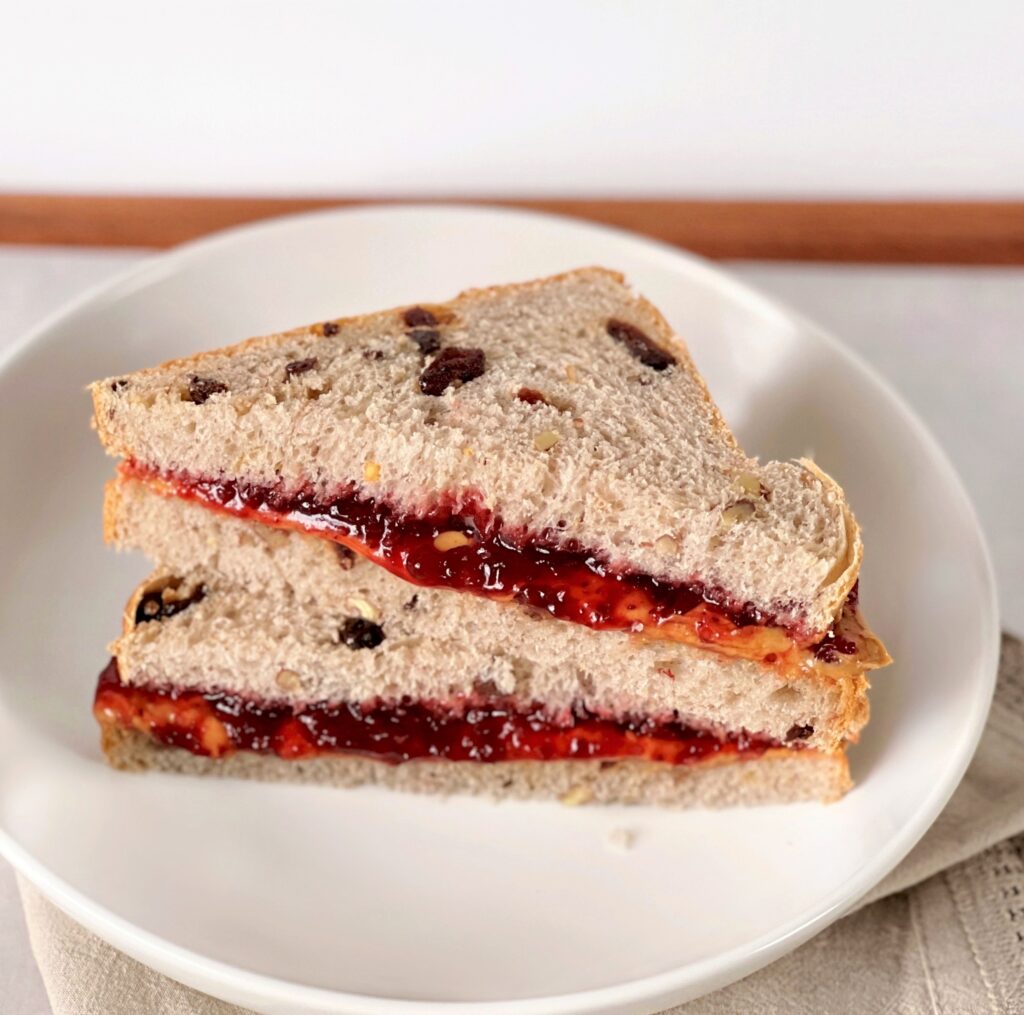
And just wait until you make your usual nut or seed butter and jam sandwich with this bread.
It turns your ordinary sandwich into such soft bites of heaven. Enjoy!
Harvest Yeast Bread
Print RecipeIngredients
- 2/3 cup warm creamy non-dairy milk (110 degrees F)
- 2/3 cup warm water (110 degrees F)
- 1/4 cup vegetable oil
- 3 tablespoons marmalade, at room temperature
- 1 teaspoon sugar
- 1 to 1 1/2 teaspoons salt
- 4 cups all-purpose flour
- 1/4 cup potato flakes
- 2 teaspoons yeast (2 1/4 tsp. yeast if baking in oven)
Add-ins
- 1/4 cup currants
- 1/4 cup dried cranberries
- 1/4 cup dried blueberries or other berry, optional
- 1/3 cup chopped pecans, walnuts, or pepitas
Instructions
Add all ingredients, except add-ins, to the bread machine pan (in the order listed).
Baking in the Oven: choose Dough Setting.
Baking in the Bread Machine: If your bread machine has the options, choose "White"and "2 lb" settings.
*Watch the dough after it starts kneading a couple of minutes in. Follow directions in "Notes" below & post above.
When machine beeps for add-ins, place the add-ins on top of the dough the bread machine pan.
When the dough is almost ready, lightly grease a 10 x 5 inch loaf pan; set aside.
Baking in the Oven: once the "Dough" cycle ends, turn out onto a surface with just the barest sprinkling of flour. Remove paddles, if they are in the dough.
Knead it into a tight ball to push out air pockets. Pat the dough into about a 10 inch rectangle. Then roll the dough tightly away from you.
Form a tight log into the size of the long sided length of your bread pan. Turn the dough over and seal the bottom.
Place in prepared pan, seam side down, then cover with a clean kitchen towel or tented parchment paper. Allow to rise in a warm, draft free area.
Preheat oven to 350 degrees F, when there is about 20 minutes rising time left. ** When dough has risen about 2" above pan rim, place in the oven
Bake for 20 minutes. Loosely tent foil over-top, and continue baking for 14-15 minutes longer- or until bread sounds hollow when lightly tapped.
Remove bread from pan, and place on a cooling rack to cool completely before slicing.
Notes
Pan Size: 3 1/2 to 3 3/4 cups flour: use 9 x 5" pan // 4 cups+ flour: use 10 x 5" Pullman pan (without a lid)
*The dough should start forming into a ball. Once it forms into a ball it should be sticky to the touch when you touch the top of it while kneading.
If it doesn't look or feel like this, then follow the directions below until it does.
-Dough feels like batter, finger sinks in, or dough clumps to it: add more flour or flakes- 1 tablespoon at a time.
- The dough feels dry, not sticky at all: add more warm water- 1 teaspoon at a time.
**Dough rising time is going to depend on how warm/cool your kitchen is. It can take anywhere from 40 minutes to 2 hours. See post above for links